In this blog post we will extend the functionality of the Progressive Web App (PWA) we’ve build in the previous blog post by adding push notifications. Or to use the appropriate terminology, make it more progressive. Push notifications are well known in the mobile world but with the support for Push API by Chrome and Firefox we now have push for the web.
The Push API gives web applications the ability to receive messages pushed to them from a server, whether or not the web app is in the foreground, or even currently loaded, on a user agent. This lets developers deliver asynchronous notifications and updates to users that opt in, resulting in better engagement with timely new content.
This means we can keep users of our PWA up-to-date and re-engage them by sending push notifications. Unfortunately the Push API is not supported by all major browsers yet. At the time of writing only Firefox, Chrome for desktop and Chrome for Android fully support this API. Support in Edge is coming soon though, service workers and Push API are already enabled by default in the Windows Insider Preview 17063.
Service Workers: Going beyond the page
— Microsoft Edge Dev (@MSEdgeDev) December 19, 2017
Beginning with today's preview release (Windows Insider Preview 17063), Service Worker, Push, and Cache are enabled by default in Microsoft Edge! Learn more and try it out today: https://t.co/HNZfn8W9eS
Support for service workers is also about to arrive for Safari with the Webkit preview 46 release. It would be nice to see support for the Push API follow soon after that.
Yes!
— John Papa (@John_Papa) December 21, 2017
Safari. PWA. Service Worker support. https://t.co/5uQbaPaX7h
So support is available or coming soon, but in case you want to build a PWA right now that can handle push notifications for all major browsers you need to use a third party tool like Onesignal or Firebase. As I’m trying to get a better understanding of these new technologies, I will stick with the ‘pure’ web push standard for this blog post. Additional benefit of following the standard is that the code we write in this blog post will work for all browsers that support this standard now or in the future.
Besides the Push API there is also the Notifications API that needs to be supported by the browser in order for our users to actually see the message that is being send on the screen. The Notifications specification has been around longer (since 2015) and as a result browsers support is pretty good.
Enough about standards, API’s and browser support, let’s continue with an overview of all the different parties that are involved.
Overview
The following parties are involved in the process of sending and receiving a push notification.
- User
- Service worker
- Web app
- App Server
- Push Service
User
Before we can send push notifications to our users we need to ask them for permission. To ensure that we aren’t able to annoyingly prompt users every time they visit our web app, we can only ask for permission once! So think carefully about how and when you ask the user for permission, because if they choose to block, we won’t be able to send them any notifications and we can’t prompt them for permission again.
I would suggest not to ask for permission the first time a user visits your PWA, chances are high they will choose to block or discard the notification. Of course we can make an educated guess about when it will be a good time to ask for permission, but I think it would be more user-friendly to let the user decide when they are ready to receive push notifications. One simple way to achieve this is to add a button or link that will subscribe the user to push notifications when clicked.
Service worker
Once the user has approved and a subscription for push notifications has been created, the service worker will listen for incoming push notifications and will show the received message in the form of a notification to the user. In Firefox and Chrome for desktop the notification can only be shown if the browser is running, but because the service worker is running in the background, the PWA doesn’t have to be opened in the browser. In Chrome for Android the user will receive a notification even when the browser and PWA are closed (the behavior is similar to a native app).
For this blog post I assume you already have created a PWA and have a service worker running. If you need help setting this up you can have a look at my previous blog post.
Web app
This will be the Aurelia SPA we turned into a PWA in the previous blog post. Because we want to put the user in control of when to subscribe to push notifications, we will not initiate the subscription to a push notification from the service worker. The web app will be responsible for subscribing the user to push notifications and sending the subscription details to the app server.
App server
The backend to our PWA. For this post an ASP.NET Core Web API written in C#. In the context of push notifications the app server has two tasks:
- Store subscriptions to push notifications for later use
- Request the push service to send a push notification
Once we have a push notification on the web app we need to save the subscription details on the server so that when an event in our application requires it, we can read the subscription details and send the user a notification. As a token of appreciation for subscribing, we also want to send the user their first push notification.
Push service
This is a service provided by a third party (f.e. Google or Mozilla) that actually sends out the push notification to the user. Because we use the Push API we don’t have to create an account with this third party. No account? But how does the push service know which application is sending a push notification, you might wonder. Doesn’t the PWA have to identify itself to the push service? Yes it does, for this purpose we need to use the VAPID protocol. VAPID is short for Voluntary Application Server Identification and defines a handshake between our PWA and the push service. It allows the push service to confirm which application is sending the message. See it as a security measure that prevents anyone else sending messages to your application’s users. Having a standard like this is good news for us developers because it means that web push will work across all browsers (assuming they conform to the standard). The VAPID details the push service requires are:
- Public key
- Private key
- Subject
The keys should be generated only once for each web app and are used by the push service to identify the application subscribing a user and ensure that the same application is messaging that user. As the name implies, the private key should be kept a secret in our app server. The public key can be shared freely and will be used by the web app to create the subscription for the push notification. Both the public and private key are used by the app server to request a push notification from the push service.
The subject should be a mailto link or URL, and can allow the operator of a push service to contact the operator of the app server. Don’t worry if the concept is still a bit unclear at this point. We will see how it all fits together when we start implementing push for our PWA.
Now that we have a general understanding of the required parts, let’s get started building them.
Create VAPID keys
Depending on your preferences you can generate VAPID keys with both an NPM or NuGet package.
NPM
We can generate VAPID keys with the web-push NPM package. Install the package and run the generate-vapid-keys command:
npm install -g web-push
web-push generate-vapid-keys
Make sure you keep the generated keys somewhere for later use.
NuGet
In this blog post we will use the WebPush-NetCore NuGet package in our ASP.NET Core Web API to handle all the hard stuff like authentication and encryption that comes with implementing the VAPID protocol. Version 1.0.2 or above is compatible with .NET Core 2.0.
Install-Package WebPush-NetCore
If you’re interested in the implementation or if you need to debug, the source code is available on GitHub. Once you have successfully installed and referenced this NuGet package you can generate VAPID keys by calling the GenerateVapidKeys method on the static VapidHelper class.
var vapidDetails = WebPush.VapidHelper.GenerateVapidKeys();
This will return an instance of the VapidDetails class with a value for the PublicKey and PrivateKey properties. Remove this line of code after you store the keys somewhere for later use (remember we only have to generate the keys once).
Subscribe a user to push notifications
As mentioned before I think it’s good practice to let the user decide when to subscribe to push notifications. We will add a button to one of our Aurelia views, in this case the Home view, that will trigger the subscription process.
<button
  title="subscribe to push notifications"
  id="subscribePushNotifications"
  if.bind="pushIsSupported"
  click.delegate="subscribeToPushNotifications()"
>
  Subscribe
</button>
Of course it only makes sense to display this button if the browser actually supports push. We use Aurelia’s if binding to conditionally bind the button to the DOM.
if.bind="pushIsSupported"
The value of the boolean is determined by checking for service workers and the PushManager.
pushIsSupported: boolean =
  "serviceWorker" in navigator && "PushManager" in window;
Next we implement the subscribeToPushNotifications function in the ViewModel that belongs to the View.
import { HttpClient, json } from 'aurelia-fetch-client';
import { inject } from 'aurelia-framework';
import { PushNotificationModel } from '../../models/push-notification-model';

@inject(HttpClient)
export class Home {
    private http: HttpClient
    pushIsSupported: boolean = 'serviceWorker' in navigator && 'PushManager' in window;
    vapidPublicKey: string = 'BL8c0LjPlpq6ir7eFrEzRDpwu58E2VTBIb0kCKIBV4tKLwal9QQwPfb6n84NsdZaKhf3nX2D0g_aKJ7ksotq4mw';

    constructor(HttpClient: HttpClient) {
        this.http = HttpClient;
    }

    subscribeToPushNotifications() {
        if (pushIsSupported) {
            navigator.serviceWorker.ready
                .then(serviceWorkerRegistration => {
                    serviceWorkerRegistration.pushManager.getSubscription()
                        .then(subscription => {
                            if (subscription) {
                                // subscription present, no need to register subscription again
                                return;
                            }
                            return serviceWorkerRegistration.pushManager.subscribe({
                                userVisibleOnly: true,
                                applicationServerKey: this.urlBase64ToUint8Array(this.vapidPublicKey)
                            })
                                .then(subscription => {
                                    const rawKey = subscription.getKey ? subscription.getKey('p256dh') : '';
                                    const key = rawKey ? btoa(String.fromCharCode.apply(null, new Uint8Array(rawKey))) : '';
                                    const rawAuthSecret = subscription.getKey ? subscription.getKey('auth') : '';
                                    const authSecret = rawAuthSecret ? btoa(String.fromCharCode.apply(null, new Uint8Array(rawAuthSecret))) : '';
                                    const endpoint = subscription.endpoint;

                                    const pushNotificationSubscription= new PushNotificationModel(key, endpoint, authSecret);
                                    this.http.fetch('pushNotificationSubscriptions', {
                                        method: 'POST',
                                        body: json(pushNotificationSubscription)
                                    }).then(response => {
                                        if (response.ok) {
                                            console.log('Push notification registration created!');
                                        }
                                        else {
                                            console.log('Ooops something went wrong');
                                        }
                                    });
                                });
                        });
                })
        }
    }
}
I know, that’s quite a lot of code, so let’s walk through it step by step.
First we check if service workers and push are supported by the browser. If not we skip to the end.
We already registered the service worker in another part of the application (see previous post) and it’s not the responsibility of this piece of code to do so, so we just check if it’s running.
navigator.serviceWorker.ready;
When this promise resolves it returns the serviceworker registration object. We use this registration object to determine whether the user has an existing subscription by inspecting the PushManager object.
.then(serviceWorkerRegistration => {
    serviceWorkerRegistration.pushManager.getSubscription()
If the user is already subscribed we’re done, if not, we subscribe the user by calling the Subscribe function on the PushManager. Remember the VAPID public key we’ve created and stored before? It’s actually an URL safe base64 encoded string and we will use it for the value of the applicationServerKey property in the options object we pass to the Subscribe function. VAPID specification requires the applicationServerKey to be an UInt8 Array, so we need to convert the public key first. I used the following method:
private urlBase64ToUint8Array(base64String) {
    const padding = '='.repeat((4 - base64String.length % 4) % 4);
    const base64 = (base64String + padding)
        .replace(/\-/g, '+')
        .replace(/_/g, '/');
    const rawData = window.atob(base64);
    const outputArray = new Uint8Array(rawData.length);
    for (let i = 0; i < rawData.length; ++i) {
        outputArray[i] = rawData.charCodeAt(i);
    }
    return outputArray;
}
The userVisibleOnly option is required by Chrome (not by Firefox) and needs to be set to true. It is a symbolic agreement with the browser that the web app will not use silent pushes (the user is not notified of a push) but show a notification every time a push is received.
.then(subscription => {
    if (subscription) {
        // subscription present, no need to register subscription again
        return;
    }
    return serviceWorkerRegistration.pushManager.subscribe({
        userVisibleOnly: true,
        applicationServerKey: this.urlBase64ToUint8Array(this.vapidPublicKey)
    })
The user will now be prompted by the browser to accept (or block) the push notifications.
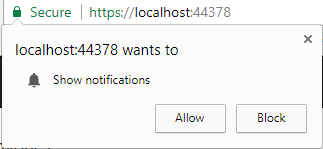

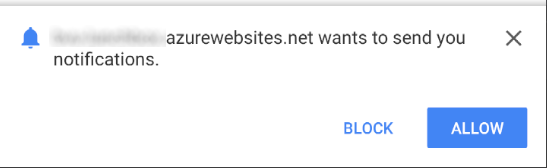
Because we have put the user in charge, it’s more likely that he or she will give permission. If a user accepts then the browser will make a network request to the push service who will generate an endpoint, associate this endpoint with the applications public key and return the endpoint to the browser. The push service will be selected by the browser so the endpoint will differ depending on the browser that’s running the web app. Chrome will return an URL starting withhttps://fcm.googleapis.com/fcm/send/, but Firefox will return something starting with https://updates.push.services.mozilla.com/wpush/v2/. Behind the last slash of the URL you will see a string that is unique to the created subscription. In other words, each subscription will have it’s own unique endpoint.
The subscribe function will return a promise containing the subscription object. Besides the generated endpoint the subscription object will also contain two keys named p256dh and auth which are required to encrypt the push message payload. If you are interested to learn more about how this encryption works, check out this detailed summary on web push payload encryption.
then(subscription => {
    const rawKey = subscription.getKey ? subscription.getKey('p256dh') : '';
    const key = rawKey ? btoa(String.fromCharCode.apply(null, new Uint8Array(rawKey))) : '';
    const rawAuthSecret = subscription.getKey ? subscription.getKey('auth') : '';
    const authSecret = rawAuthSecret ? btoa(String.fromCharCode.apply(null, new Uint8Array(rawAuthSecret))) : '';
    const endpoint = subscription.endpoint;
Next we create an instance of a PushNotificationModel.
const pushNotificationSubscription = new PushNotificationModel(key, endpoint, authSecret);
This model holds all the required information to save the subscription on the app server
(the backend) and to create our first push notification.
export class PushNotificationModel {
  endpoint: string;
  key: string;
  authSecret: string;

  constructor(key: string, endpoint: string, authSecret: string) {
    this.key = key;
    this.endpoint = endpoint;
    this.authSecret = authSecret;
  }
}
We send this model as the body of a POST request to the Create method on the PushNotificationSubscriptionsController of our ASP.NET Core Web API. After the request completes we read the HTTP status from the response object to determine if the subscription request completed successfully. In this example we just write a message to the browsers console, but you could also choose to write something to a log and or give the user feedback of some sort in the UI (especially if something went wrong).
this.http
  .fetch("pushNotificationSubscriptions", {
    method: "POST",
    body: json(pushNotificationSubscription)
  })
  .then(response => {
    if (response.ok) {
      console.log("Push notification registration created!");
    } else {
      console.log("Ooops something went wrong");
    }
  });
Handling the subscription on the app server
In the ASP.NET Core Web API we will register the subscription and request a push notification from the push service to thank the user for subscribing to our web app’s push notifications.
If you haven’t already done so in step 1, install the WebPush-NetCore NuGet package. Version 1.0.2 or above is compatible with .NET Core 2.0.
So far we only used the public VAPID key, but in the app server we will need the private key too. Because the private key is sensitive data, it is best practice to store the private VAPID key out of source control. We can use the secret manager for this purpose. Although only the private key is sensitive data I choose to store all the VAPID details along with it in the secret manager to keep all the related data together in one place. In the ConfigureServices method of the Startup class we read the ‘VAPID’ section of secrets.json, bind the values to a VapidSettings model and make sure we can inject it into our controllers using the options pattern in ASP.NET core.
services.Configure<VapidSettings>(Configuration.GetSection("VAPID"));
Now let’s have a look at the PushNotificationSubscriptionsController and the Create endpoint.
using System.Net;
using System.Threading.Tasks;
using Bvu.Lunchbox.Web.Models;
using Microsoft.AspNetCore.Mvc;
using Microsoft.Extensions.Options;
using Newtonsoft.Json;
using WebPush;

namespace Bvu.Lunchbox.Web.Controllers
{
    public class PushNotificationSubscriptionsController : Controller
    {
        private readonly VapidSettings _vapidSettings;

        public PushNotificationSubscriptionsController(IOptions<VapidSettings> vapidSettings)
        {
            _vapidSettings = vapidSettings.Value;
        }

        [HttpPost("api/[controller]")]
        public async Task<IActionResult> Create([FromBody] PushNotificationSubscription subscription)
        {
            var pushSubscription = new PushSubscription(subscription.Endpoint, subscription.Key, subscription.AuthSecret);
            var vapidDetails = new VapidDetails(_vapidSettings.Subject, _vapidSettings.PublicKey, _vapidSettings.PrivateKey);

            var webPushClient = new WebPushClient();
            webPushClient.SetVapidDetails(vapidDetails);

            //TODO; store pushsubscription for later use

            // send notification
            var payload = new PushNotificationPayload
            {
                Msg = "Thank you for subscribing",
                Icon = "[URL to an image to display in the notification]"
            };

            try
            {
                await webPushClient.SendNotificationAsync(pushSubscription, JsonConvert.SerializeObject(payload), vapidDetails);
            }
                catch (WebPushException exception)
            {
                var statusCode = exception.StatusCode;
                return new StatusCodeResult((int)statusCode);
            }

            return new OkResult();
        }
    }
}
The Create method takes the subscription we’ve send from our web app as a parameter. Next we create an instance of the PushSubscription and VapidDetails classes (provided by the WebPush-NetCore NuGet package). We create a new WebPushClient and set its VAPID details.
Now would also be a good time to store the unique push subscription details so that we can use it in the future whenever we have something else to push to the user. The most obvious option would be to use a database, but I leave it up to you how and were to store this .
Finally, it’s time to send our first push notification! We call the SendNotificationAsync method on the WebpushClient and provide it with the push subscription, VAPID details and a payload. The payload will be displayed on the notification, and in this case, consists of a thank you message and the icon we use for our PWA. The SendNotificationAsync method will throw a WebPushException if it fails to create a push notification on the push service. So we wrap the call in a Try Catch statement and send the HTTP statuscode back to our web app if anything goes wrong.
That’s it for the app server, now one final step remains.
Receiving the push notification
At this point we are able to create a subscription to push notifications and request a push notification from the push service. Now we need to make sure we can receive a push notification when the push service sends us one. To do so, add the following to the service worker.
self.addEventListener("push", event => {
  if (event.data) {
    var payload = event.data.json();
    var title = "Lunchbox";
    var options = {
      body: payload.msg,
      icon: payload.icon
    };

    event.waitUntil(self.registration.showNotification(title, options));
  }
});
Here we add an EventListener to the service worker that listens to push events. When the service worker receives a push notification from the push service we read the payload of the data. Next we define a title for the notification and create an options object and configure the body and icon properties with the values from the payload. Then we show the notification by calling theshowNotification function on the registration property of the service worker and pass in the title and options as parameters.
At this stage we should have everything in place. Launch your PWA in Firefox, Chrome or Android, hit the subscribe button and see the notification appear.
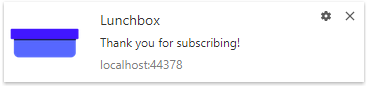
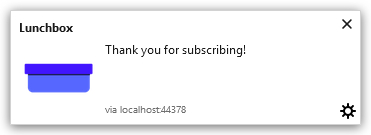
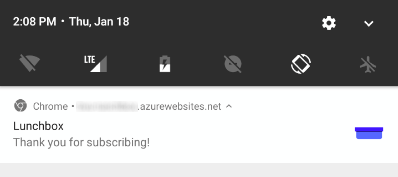
Congrats, with that single mouse-click you have successfully subscribed to push notifications, requested and received the first push and saw the notification pop up on your device!
It might be worth noting that the subscription is specific to the device and browser. In case a user wants to receive push notifications on, for example both phone and desktop, they would need to subscribe twice.
Conclusion
Hopefully this blog post gave you some insight in how you can implement push for the web. It would be nice to see more browsers support this feature in the near future. In this post we chose to implement the standards, this will give us the benefit of not having to change a single line of code when Edge, Safari or some other browser implements the Push API. Push notifications will just start working for those browsers as well!